


How do I configure my Android Device to connect and sync with my RCI Account?
Please note, OIT provides only limited support for mail clients on Android Devices. This is due to the fact that, unlike most Android apps, Android mail clients are created and maintained by the device manufacturers, and can have different specifications and layouts depending on both the manufacturer and the device model. If the instructions provided are not compatible with your device, we suggest that you take note of the configuration that our systems require and contact your device manufacturer for additional assistance.
These instructions were generated using an Android Tablet made by Samsung, running Jellybean (v4.1.2), for clarity and visibility.
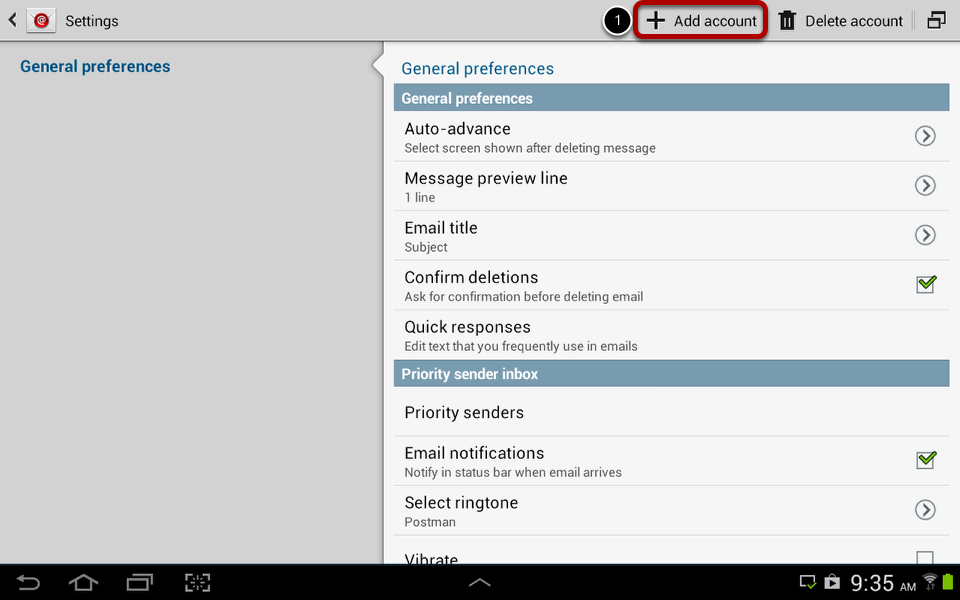
To start the process of adding an account, open the mail client's Settings screen, and tap the Add Account button.
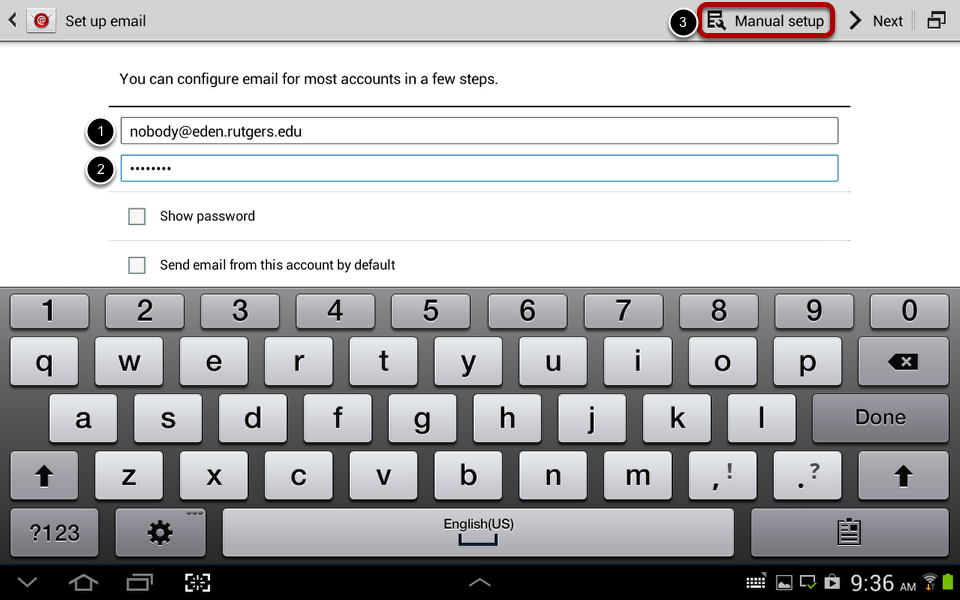
On this screen, enter the full email address (netid@rci.rutgers.edu) (1) and the NetID password (2), then tap Manual setup (3) (if available).
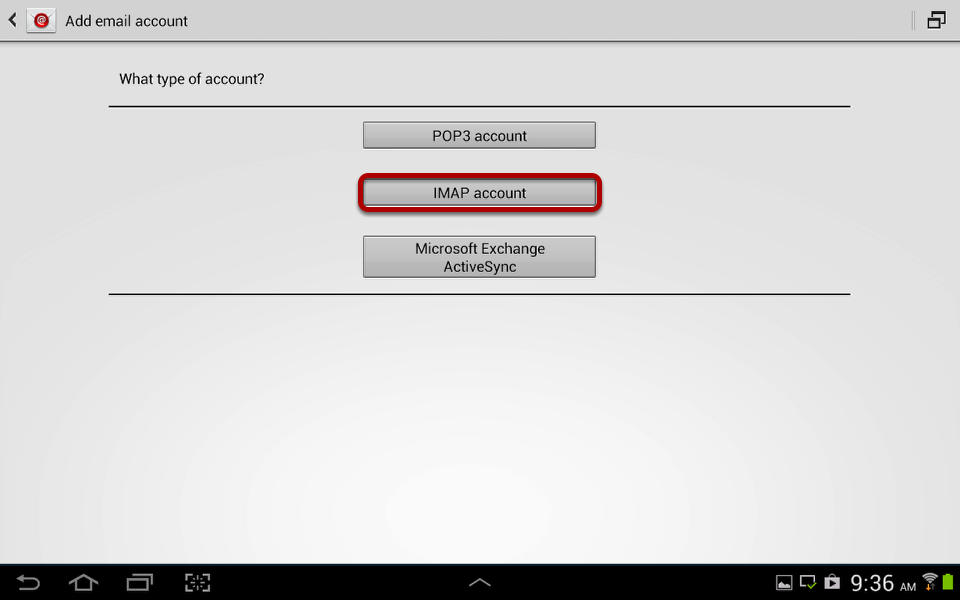
Next select the type of account. Tap the IMAP account button.
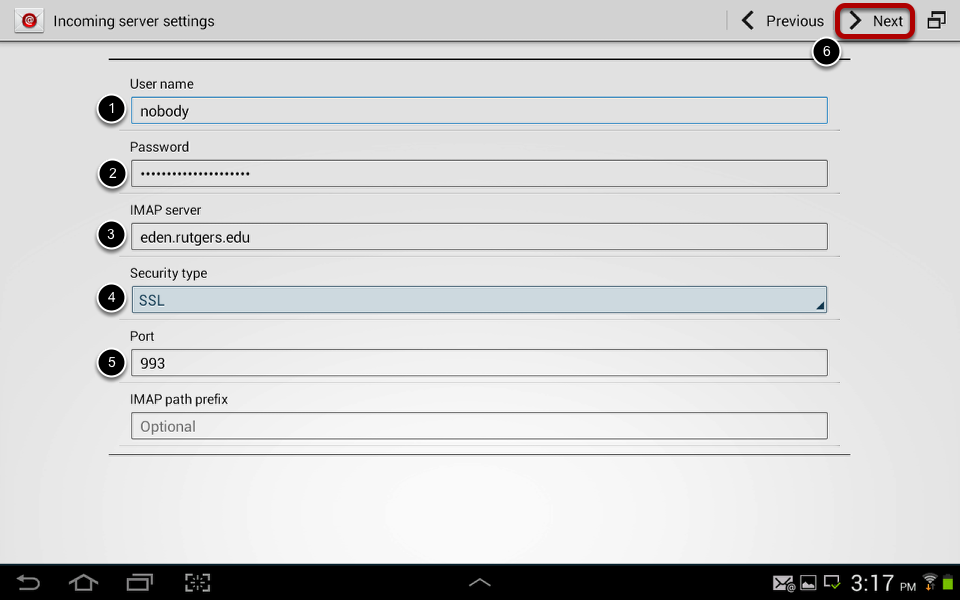
On the next screen, for the Incoming Server Settings, your NetID and password should be automatically filled-in; if they are not, provide your
- NetID as the User name (1), and NetID Password as the Password (2).
- Set the IMAP server to "eden.rutgers.edu" or "rci.rutgers.edu" (3).
- Set the Security type to SSL (4), which should automatically set the Port to 993 (5).
- The IMAP path prefix should be left blank. (This option doesn't always show up, and if it's missing, that's ok.)
Once the settings match those depicted above, tap Next > (6)
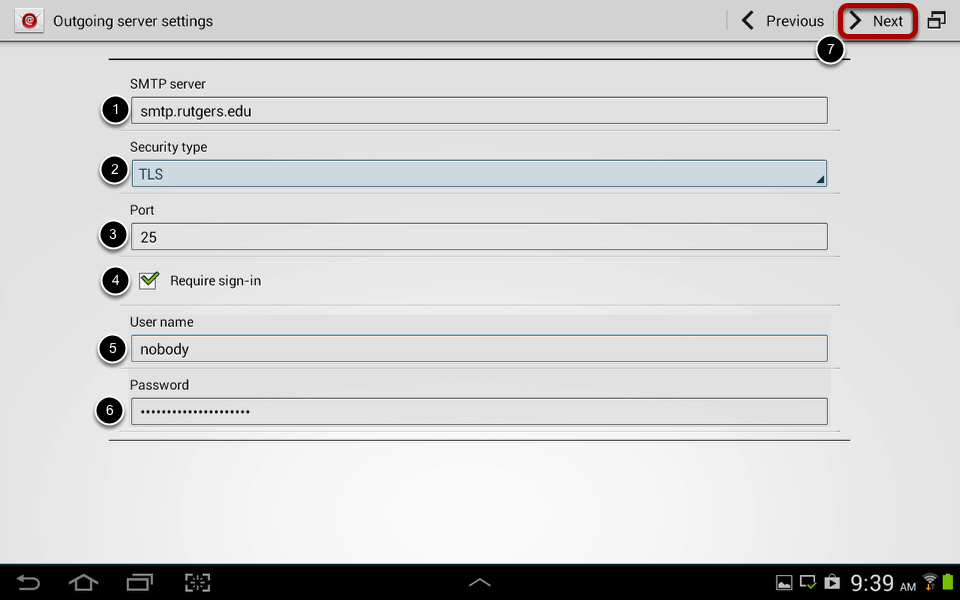
On the next screen,
- For the Outgoing Server Settings, set the SMTP Server to be "smtp.rutgers.edu" (1).
- Set the Security type to TLS (2). This should cause the Port number to be automatically set to 25 (3); if it does not, manually change the Port number to 25 or 587.
- The Rutgers SMTP Server does require sign-in (4), and the credentials for this should again be the NetID (5) and password (6) for the account. (These may be auto-filled, if they are not, you should enter them manually.)
Once your settings match those depicted above, tap Next > (7).
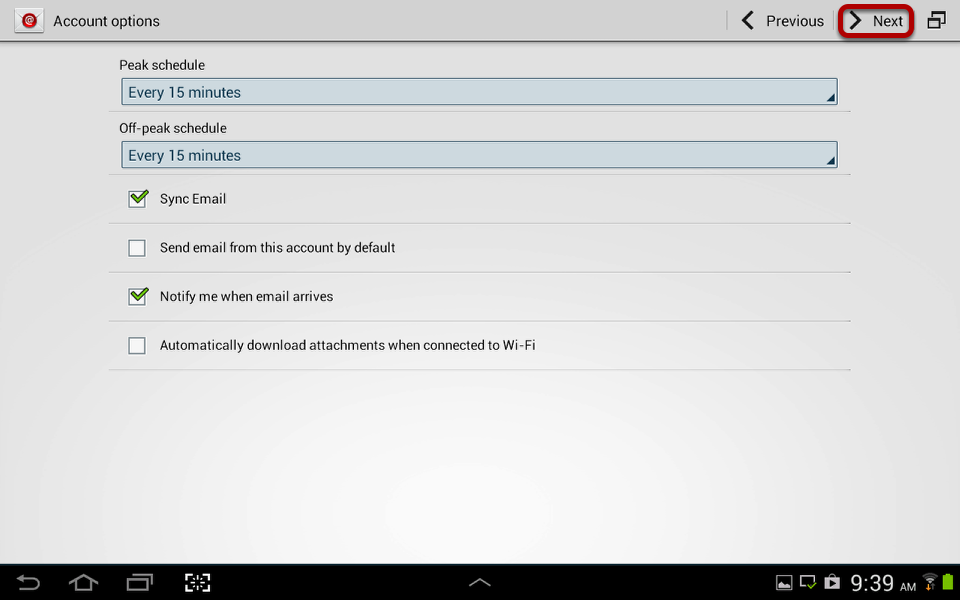
On the next screen, the device will prompt you to define how frequently you want it to check for new mail in your Inbox, and to attempt to send mail. These timeframes are set at your discretion - Rutgers systems do not require any special settings. (By default, most devices consider Peak time to go from 7am to 8pm, with Off-peak from 8pm to 7am, but you can configure these settings to different values elsewhere in your Device.) You'll need to keep Sync Email activated (otherwise, your email will not be sent and received). The other three settings can be selected at your discretion.
Once your settings satisfy those depicted above, tap Next >
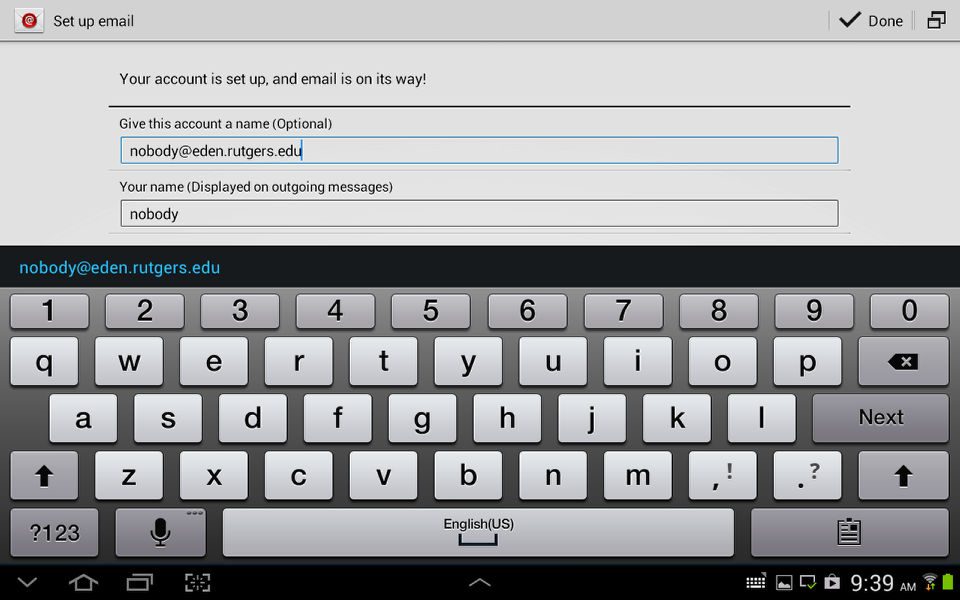
On the final setup screen, you are given the option to name the account, and configure how your name is displayed on outgoing messages. Both of these settings can be filled out however you prefer.
Tap Done, and you should be taken to your newly-configured inbox.