


The Address Book tab allows you to collect and organize your e-mail correspondents. The default address book is called "Contacts". You can create other address books with other names.

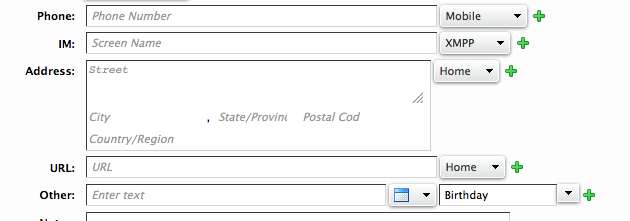
The initial Address Book tab provides buttons for common tasks: creating New entries, Editing or Deleting existing entries, Searching existing entries, Moving entries to other address books, Printing or Tagging entries, and Forwarding contact information via email.
-
Creating an Address Book Entry
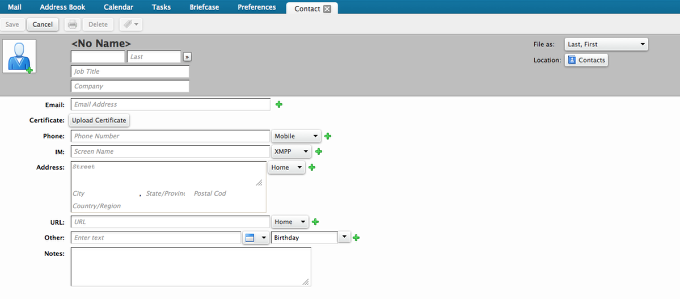
Click the New Contact button. The New Contact pane opens. There are separate sections for the information for your Contact. Enter the appropriate information in each box. You do not need to fill in every box. Click the Save button when you are done.

Click the plus sign in the photo area to upload an image of the person to RUMail from your computer.
Note: Many items have pull down menus, which all you to customize the information you enter. For example:
- The File As pulldown menu will let you determine how the entry appears in the address book. The default setting is "Last Name, First Name."
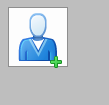
- The Phone pulldown menu lets you enter different phone numbers for each phone-related service your contact has.
- The Location pulldown menu lets you put the entry into any of your existing address books.
- The IM Address pulldown menu will allow you to select one of several common Instant Message services (and an Other entry for services not included, such as Rutgers IM). Click the plus sign next to the menu to add another IM Address area, to allow for a person having more than one IM service.
-
Editing an Existing Address Book Entry
Select an entry in an address book. Click the Edit button. The same tabs available when creating an entry are present for changing information. Enter the appropriate information in each box. You do not need to fill in every box. Click the Save button when you are done.
-
Creating an Address Book Entry from an Email Message
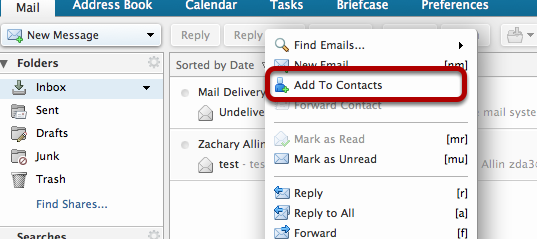
In the Mail tab, locate a message from the person you wish to add to the Address Book. Right-click on the name in the From column to show the menu.
Select Add to Contacts. (If an entry for the email address in the From line already exists in one of your address books, including the Global Address List, RUMail will show an Edit Contact item instead.) An entry for the person will be created.
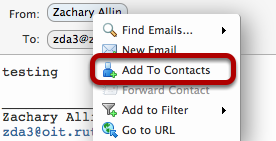
If you are reading the message,Right-Click the name in the From header to create a new Address book entry for that address.
RUMail will try to determine First Name, Last Name, and Email Address from the From header of the message and will populate the appropriate boxes. Review the information, make any additions or changes desired, and Save the entry.
-
Deleting an Address Book Entry
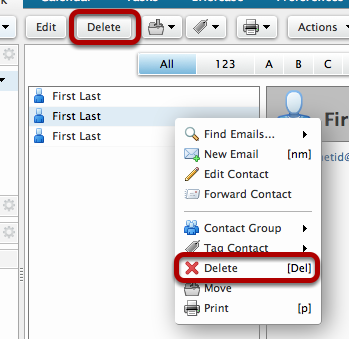
Select the entry and click the Delete button. You can also right-click on the entry and select Delete from the menu.
-
Creating A New Address Book
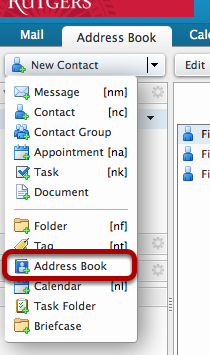
Click the New Address Book button which appears in the drop down menu of the Address Book tab.
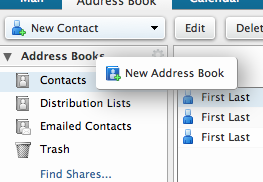
Alternatively, you can right-click on the "Address Books" heading and select New Address Book.

In the Create New Address Book pop-up window, enter the name for the Address Book in the Name box. Use the Color pulldown menu to select the color for the Address Book's name. Under "Select where to place the new folder", click on the name which should hold the new Address Book. If you want it to be equivalent to the existing Contacts address book, select "Address Books"; if you want it to be a subfolder within Contacts, select the "Contacts" name.
Click the OK button to create the Address Book.
-
Contact Groups
You can create mailing lists out of your Address Book entries and send messages to multiple people using a single name. These are called "Contact Groups".
-
Creating a New Contact Group
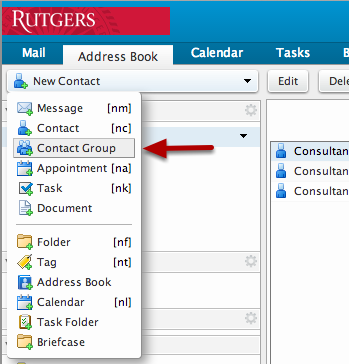
Click the Drop down box and select Contact Group from the menu.
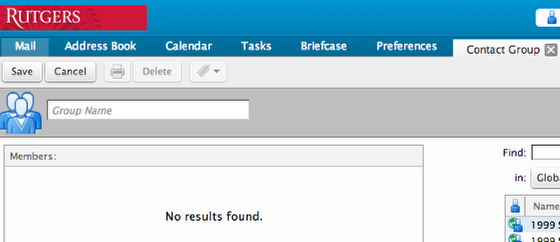
In the new pane, enter a Group Name to store the name of this group.
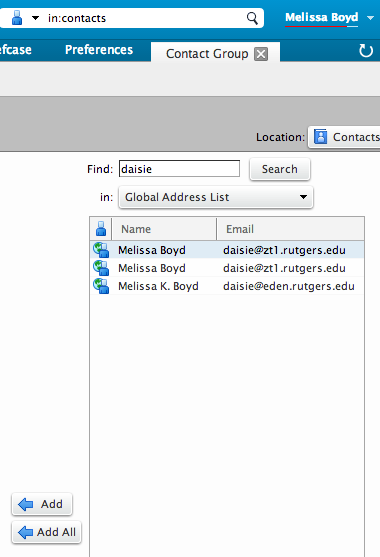
Members of a Contact Group can come from any of your Address Books, any other RUMail Address Books shared with you, or the Global Address List. In the Find box, enter a part of the person's name. You can select specific Address Books using the pulldown menu next to "in:". Click the Search button to search for that name part in the selected Address Book.

Any matches will appear below. Select the name you want to add and click the Add button. You can select a range of names by clicking one name, then shift-clicking another; all the names between (and including) those two will be selected. To select multiple but separate names, on a Windows system control-click on each one (hold down the Control or Ctrl key while clicking); on a Macintosh, command-click instead.
Click the Save button when you are through adding names to the Contact Group.
An existing Contact Group can be edited in the same manner as a single name can. See "Editing an Existing Address Book Entry" above.
-
Using an Address Book
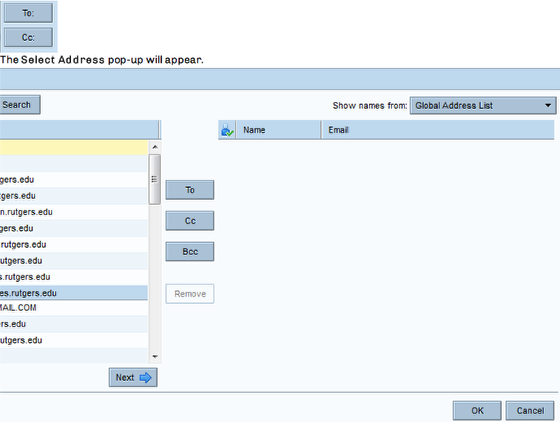
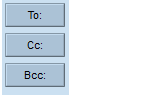
To add email addresses from an Address Book to an outgoing message, compose a new message and click the button for the field (To: or CC:).
Use the "Show names from" menu to select the Address Book you want. Either scroll through the list of addresses in the left-hand column to find the entry you want or type some portion of the person's name in the search box and click the Search button. Click the entry name, then click the To, Cc, or Bcc button to add that address. The address will appear in the right-hand column with the selected field name (To, Cc, or Bcc) in front of it. Click the OK button when you're done selecting addresses. The pop-up will close and the selected addresses will appear in the selected fields of the message.
Continue composing and sending the message, as usual.

If you selected a Contact Group in the Select Address pop-up, the addresses of the members of the group (rather than the group name) will appear in the selected field.